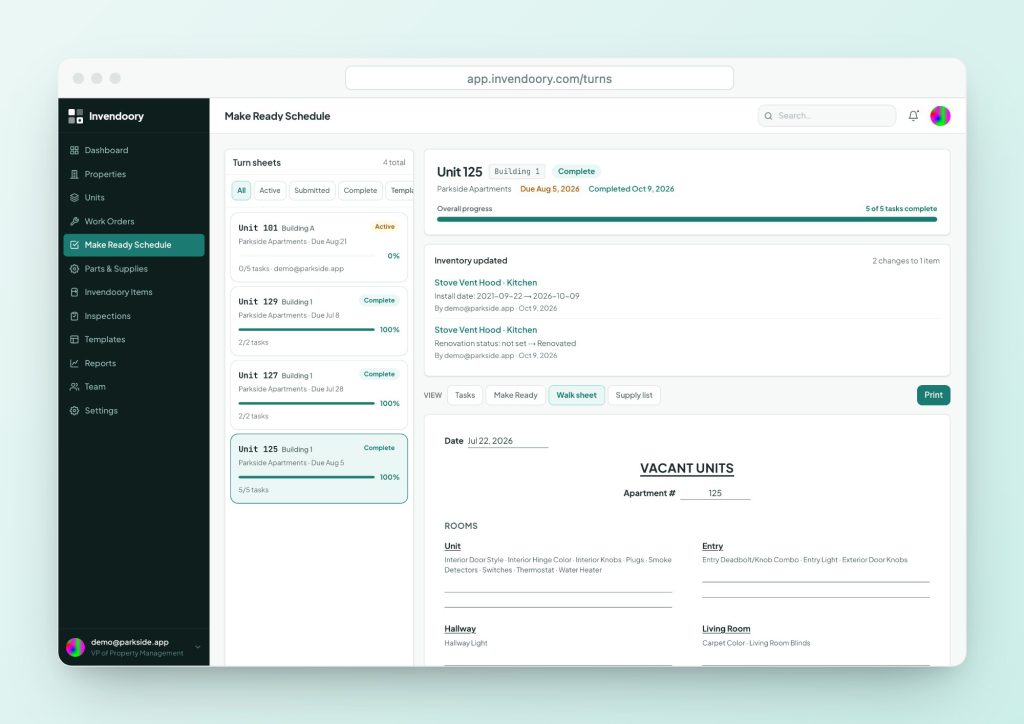
Use this apartment make ready checklist to walk a vacant unit, group the work by room and sign it off. Print this page and take it to the unit.
How to use this make ready checklist
This make ready checklist follows the order work really happens in a vacant unit: walk, clear, repair, paint, clean, then final inspection. Each table is one stage or one room, with a box to tick and a note on what to look for.
It is built on the same shape as the paper walk sheet that Invendoory was built from. That sheet had twelve areas with lines to write on, a spot for other damages and a line for who walked the unit. We added the repair and final-inspection detail that sheet leaves to the tech. The NAA’s turnover guidance describes the same sequence: inspect, remove trash, change to a vacant lock, paint, repair, clean, carpet, then a final inspection.
Print this page. The site prints cleanly, so use your browser’s print command and the tables become a paper walk sheet. Write the unit number and date at the top, and note damage next to the line it belongs to.
Step 1: walk and secure the unit
| Done | Check | What to look for |
|---|---|---|
| ☐ | Record unit number, date and who walked it | Put your name on the sheet. The walk is the record of what you found. |
| ☐ | Change to the vacant lock | Re-key or swap the cylinder so previous keys no longer work. |
| ☐ | Photograph each room before work starts | Wide shot of each room plus close-ups of damage. Photos settle later charge disputes. |
| ☐ | Note items left behind | Remove trash and personal items. Follow your property’s and your state’s rules for abandoned property. |
| ☐ | List damage beyond normal wear | Write it down by room. Decide what is a resident charge and what is a property cost. See normal wear and tear. |
| ☐ | Turn off or check heaters and water | Heaters off if the unit will sit vacant. Look for leaks under sinks and around the water heater. |
| ☐ | Order parts and supplies from the walk | Anything not on the shelf goes on the order today, not tomorrow. |
Step 2: repairs by room
| Done | Area | What to look for |
|---|---|---|
| ☐ | Doors | Closing and latching, hinges tight, no holes in hollow-core doors, stops in place, deadbolt turns freely. |
| ☐ | Drywall repairs | Patch holes and anchors, sand, prime. Mark patches so painters know. |
| ☐ | Kitchen, cupboards and counters | Hinges, drawer slides, doors aligned, counter edges and seams, faucet and sink drain, under-sink leaks, disposal runs. |
| ☐ | Appliances | Range burners and drip pans, oven heats, anti-tip bracket attached and range engaged, refrigerator cold with trays and crispers intact, dishwasher runs a full cycle, microwave works. |
| ☐ | Washer and dryer | Hookups, hoses, lint trap clear, dryer vent clean and unobstructed, cycles complete. |
| ☐ | Bathrooms | Toilet flushes and seals, seat tight, tub and shower drain and fixtures, caulk intact, vent fan runs, mirror and towel bars secure. |
| ☐ | Electrical | Switch and outlet covers all present, outlets and GFCIs test, every light works, bulbs match in color, ceiling fans run. |
| ☐ | Safety devices | Smoke alarms tested and under 10 years old, carbon monoxide alarm present where required, fresh batteries. |
| ☐ | Heating and cooling | Thermostat responds, heater or A/C runs, filter replaced, vents clear. |
| ☐ | Windows, screens and blinds | Windows open, lock and seal. Screens and sills intact. Blinds straight, complete and operating. |
| ☐ | Patio or balcony | Rail secure, slider tracks clear, light works, surface clean. |
Step 3: paint, flooring and cleaning
| Done | Check | What to look for |
|---|---|---|
| ☐ | Paint | Touch-up or full repaint per property standard. Check ceilings, trim and closets, and the paint around patched areas. |
| ☐ | Carpet and vinyl | Replace or shampoo. Record which you did. Check seams, transitions and tack strips. |
| ☐ | Deep clean | Cabinets inside and out, appliances, tub and toilet, windows and tracks, floors, light fixtures. |
| ☐ | Pest check | Look for roaches, rodents, bedbugs and fleas. Treat before a new resident moves in. |
| ☐ | Clean up after trades | Dust and paint splatter from painting, drywall and flooring work gets cleaned last. |
Step 4: final inspection and sign-off
| Done | Check | What to look for |
|---|---|---|
| ☐ | Walk every room against this list | A different person from the one who did the work, if you can. |
| ☐ | Test the water and lights | Run the hot water until it is hot. Flip every switch. |
| ☐ | Check the keys and access | Count keys. Test the lock. Confirm any mailbox and fob access. |
| ☐ | Photograph the finished unit | Same angles as the start. This is the “before the next resident” record. |
| ☐ | Sign and date | Walked by, verified by, date ready. The leasing office can now show it. |
Supplies to have on the cart
| Group | Typical items |
|---|---|
| Switch plates and electrical | Switch and outlet covers (single, double, triple), blank plates, switches, outlets, USB outlets, smoke detectors and batteries, LED bulbs |
| Kitchen | Drip pans, burners, vent filters, range hood, refrigerator crisper trays, appliance bulbs, faucet, cabinet hinges |
| Bath | Toilet seat, toilet internals, seal, bolt caps, towel bar and ring, toilet paper holder, shower head and knobs, faucet parts |
| Heat, doors, windows and blinds | Thermostats, passage, privacy and entry knobs, deadbolts, hinges, spring door stops, screens, blinds |
| Consumables | Weatherstripping, drywall tools, trash bags |
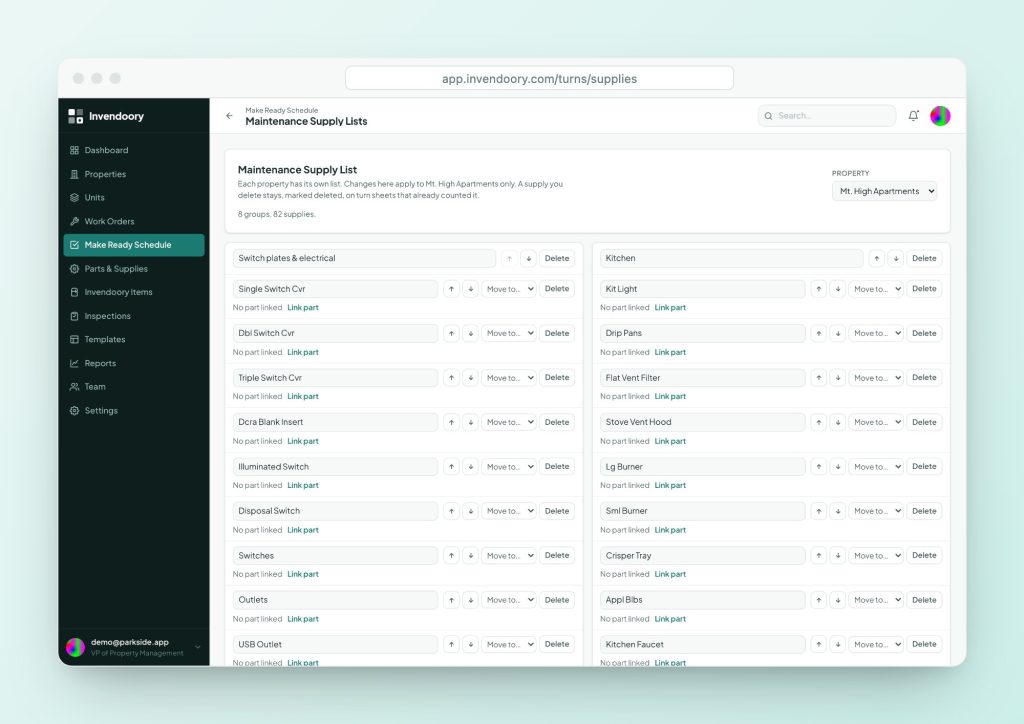
This is a short version. The full 82-item list, grouped the way the paper form groups it, is in the maintenance supplies list.
Run this make ready checklist in Invendoory
Everything above becomes a turn template in Invendoory: a reusable task list you start each turn sheet from. The app ships a Vacant unit walk template with twelve tasks taken from the paper form: carpet and vinyl, painting, doors, drywall repairs, cleaning, washer and dryer, appliances, blinds, patio, kitchen and counters, bathrooms and heaters. Edit it to match your list.
Each task has an assignee and moves from Not Started to In Progress to Complete, with notes and phone-camera photos. For an item task, the tech marks Replaced, with the part that went in, or Serviced. A tech turns the sheet in, and a property manager verifies it or sends it back with a reason.
- Start from a turn template or a Make Ready template
- Supply quantities recorded on the sheet
- Write in up to 6 extra supplies
- Verify to update stock and inventory
Paper or phone: both work
Crews who prefer a clipboard can print the walk sheet from a turn sheet. It lists the unit’s own rooms and what is installed in each, plus the paper supply form, and the office keys results into the same sheet afterward.
On the phone, a tech works the sheet in the browser with nothing to install. When a sheet is verified, supplies used come out of stock and replaced appliances and finishes become new installs with today’s date. The next inspection or move-out charge then reads the right equipment. The Make Ready platform page has the full flow.
Questions people ask
What should be on an apartment make ready checklist?
Cover the walk and lock change, repairs by room, safety devices, paint, flooring, cleaning, a pest check and a final inspection. Keep a line for damage beyond normal wear and for who walked the unit and when.
What is a make ready sheet?
A make ready sheet is the one-page form a tech carries through a vacant unit. It lists areas to check, a place to note damage, the supplies used and a signature. Some properties call it a turn sheet or walk sheet.
How is an apartment turnover checklist different from a make ready checklist?
Turnover covers the full cycle including notice, marketing and leasing. A make ready checklist covers only the physical work in the unit. Use both: the make ready list for the crew and a turnover list for the office.
Who should do the final inspection?
Ideally someone other than the person who did the work, usually the property manager or lead tech. A second pair of eyes catches the missed bulb or the dirty oven before a resident does.
Can I customize this checklist?
Yes. Copy the tables into your own form and remove what your property doesn’t have. In Invendoory you edit the turn template and every new turn sheet starts from your version.
How long should the checklist take to complete?
The walk usually takes well under an hour. The NAA notes that many companies use seven working days as an average turn guideline, with five or three expected in some groups. Your checklist should fit your target.
Sources
- NAA, Apartment Turnover (March 2025)
- NFPA, Smoke Alarms at Home safety tips
- NFPA, Clothes Dryer Safety tips
- CPSC, Range Tipover Safety Alert (publication 5007)
Checked October 2026.